
Remote Fuel Filter Kit for 6.5L Chevy/GM
Installation Instructions
This document serves as the installation instructions for the RFFK - Remote Fuel Filter Kit
Kit Contents:
2x M8 x 30mm Set Screws
2x M8 Flange Nuts
2x ⅜" x 1" Hex Head Bolt
2x ⅜" NPT Hollow Hex Plug
2x ⅜" Male NPT x #6 Male JIC
2x #6 Female JIC Swivel x ¼" Hose Barb
Mounting Bracket
Baldwin BF1212 Fuel Filter
6x ¼" Fuel Injection Line
6x #4 Mini Hose Clamps
2x 90° Fittings
Teflon Tape
Tools Required:
14 mm wrench
⁹⁄₁₆", ¹¹⁄₁₆" and ¾" wrenches
15 mm socket, extension, and ratchet
⁵⁄₁₆" Allen key wrench
Flat head screwdriver
Installation Steps:
Thread the M8 x 30mm studs into the designated holes. Slide the aluminum bracket over the studs and secure with the M8 flange nuts.
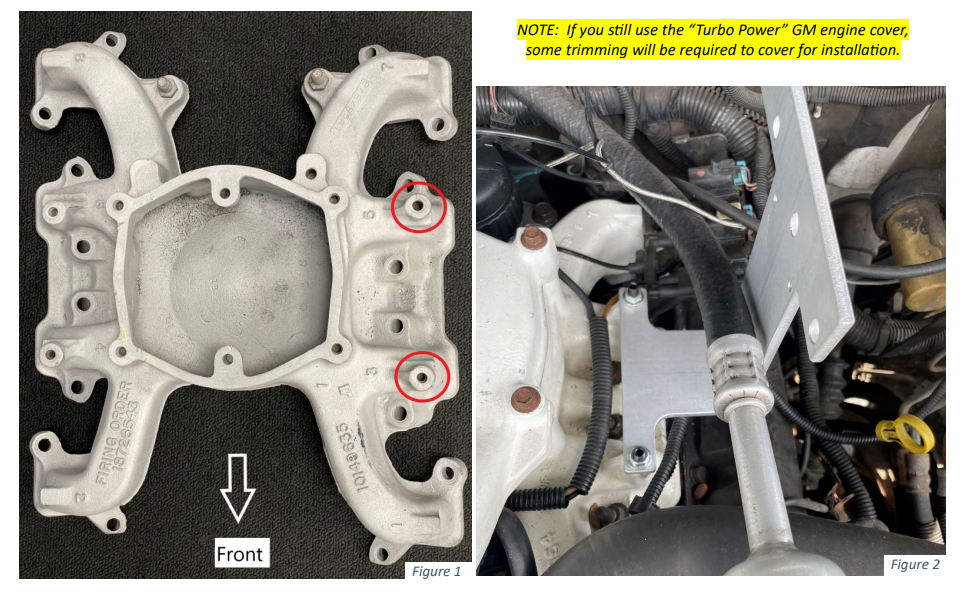
Bolt the filter housing onto the mounting bracket with the two 3/8" x 1" supplied bolts. NOTE: If you still use the "Turbo Power" GM engine cover, some trimming will be required for installation.
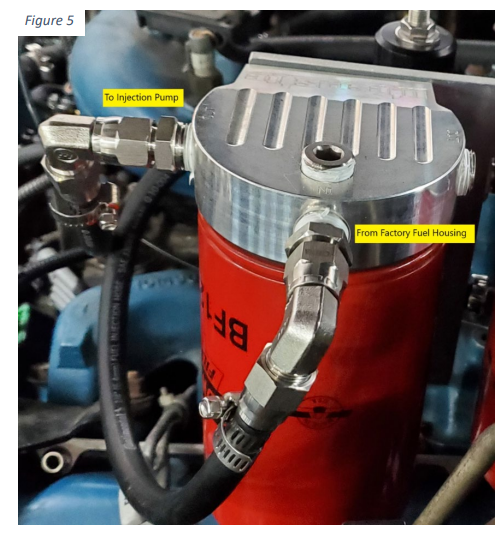
Install the two 3/8" hex plugs into the filter housing – plug up one IN port and one OUT port – using the Teflon tape to seal. Our instructions are written based on plugging the top surface IN port and the right side OUT port.
Use Teflon tape and install the two straight fittings (⅜" Male NPT x #6 Male JIC) in the remaining ports of the filter housing. Once installed, add the 90° fittings and hose barb fittings to each.
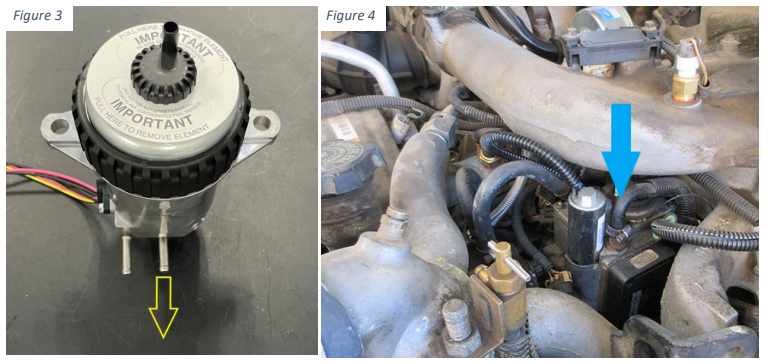
Locate the fuel hose that runs from the factory fuel bowl to the injection pump inlet on the top of the injection pump. Remove this line from both the injection pump and the factory fuel bowl by unbolting the factory fuel filter and lifting it up to get better access to the outlet stem of the factory fuel bowl. NOTE: The factory fuel bowl will empty out once you unclamp and remove the fuel line. Use a small catch basin or rag to catch the excess fuel.
Cut the supplied fuel injection hose long enough to reach from the hose barb on the filter housing OUT port to the injection pump.
With the remaining fuel injection line, cut a length to reach the hose barb on the IN port of the filter housing to the factory fuel housing. How you route the line will determine its length. Connect the hose to each end and secure with supplied clamps.
After installation is complete, it is best to remove the air and prime the new filter system by operating the electric lift pump for about 2 minutes. This is done before starting the engine.
Quick Tip:
The filter housing has two Inlet Ports and two Outlet Ports. You will only be using one IN port and one OUT port for the installation of this kit. The additional ports are there only for your convenience to use as locations for other modifications, gauges, etc. You may follow these instructions for installation as a guide OR get creative on how you use these ports!
Priming the System:
For 1994 C-K vehicles:
Locate the fuel pump relay fastened to the passenger-side firewall.
Disconnect the electrical connector that plugs into the bottom of that relay.
Use a jumper wire to jump between the terminals of the GREY and ORANGE wires of the connector to power the lift pump.
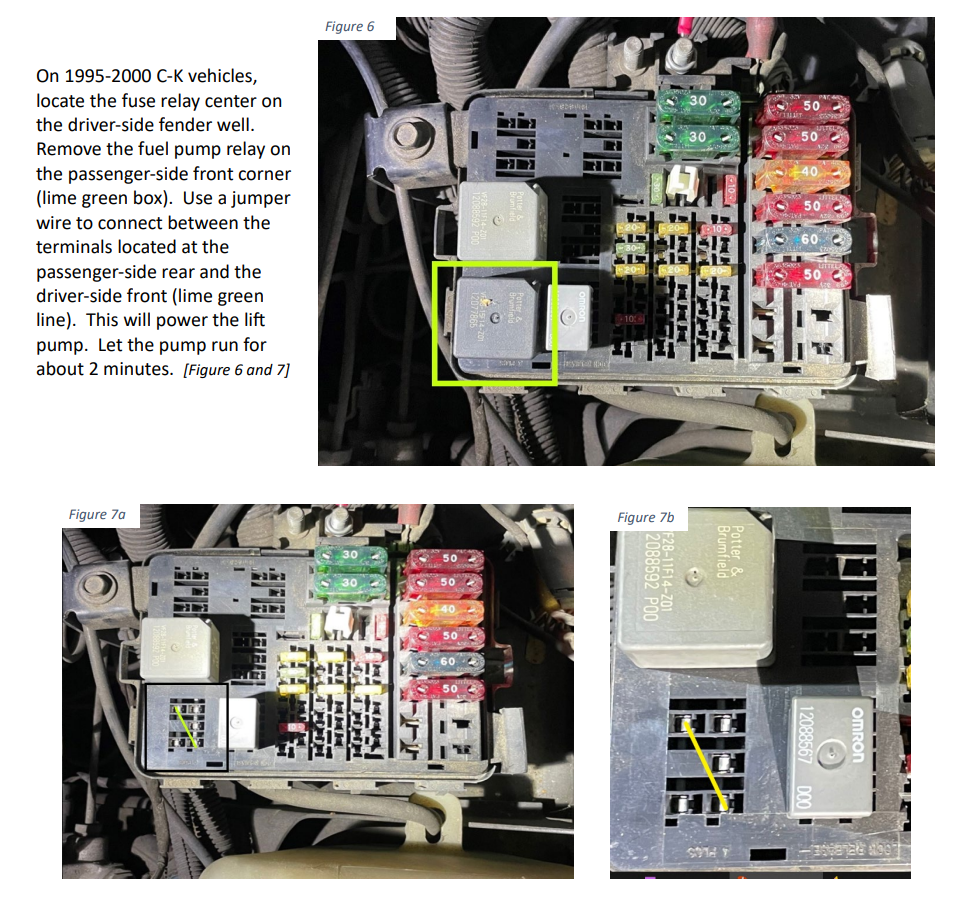
For 1995-2000 C-K vehicles:
Locate the fuse relay center on the driver-side fender well.
Remove the fuel pump relay on the passenger-side front corner.
Use a jumper wire to connect between the terminals located at the passenger-side rear and the driver-side front.
This will power the lift pump. Let the pump run for about 2 minutes.
Conclusion:
This additional filtration system extends the life of your injection pump that is vulnerable to water and contaminants. The bracket included is designed to be used with fuel filter, coolant filter, and regulated fuel system components. The bracket can be used for each individual kit or all three together.