Glow Plug Harness Instructions
How to Install the 6.5 Turbo Diesel Glow Plug Harness
Introduction
This article provides step-by-step instructions for installing the Quadstar Tuning 6.5 Turbo Diesel Glow Plug Harness. This installation typically takes 2-3 hours and requires common tools.
Tools and Preparation
Common socket tools. 13 and 15mm
Screwdriver
Penetrating oil
Zip ties
Disconnect the Batteries
Initial Disassembly
Access the Glow Plug Controller:
Remove the plastic cover over the intake to access the Glow Plug Controller.
The controller is at the rear of the driver side cylinder head
Remove the Old Harness:
Carefully remove the old harness, avoiding damage to the glow plugs.
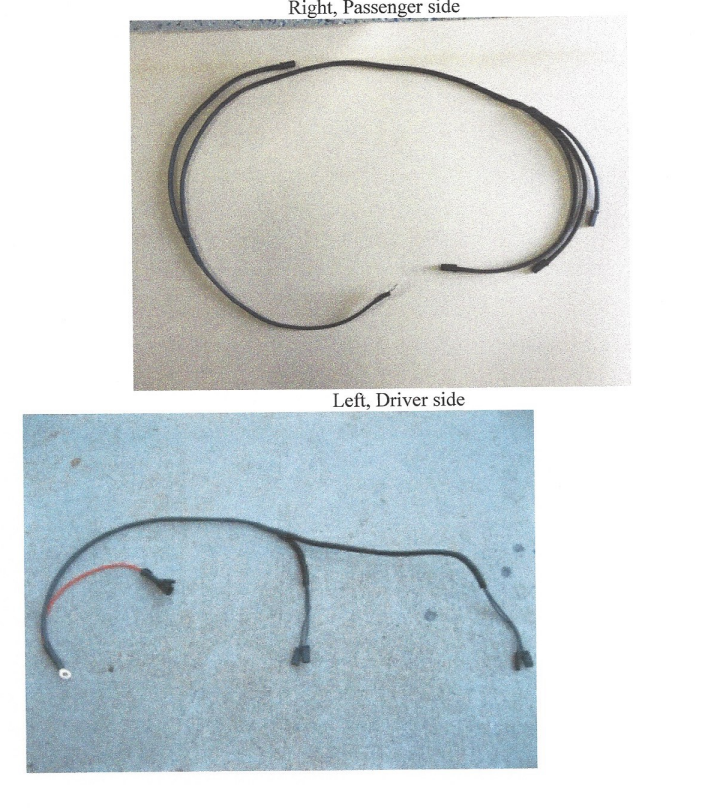
Cylinders 1, 3, 5, and 7 are accessible on the driver's side.
For cylinders 4 and 6 on the passenger side, remove the right front wheel and access them through the wheel well.
Use penetrating oil on the 15mm nuts securing the tubes to the exhaust manifold. Remove the tubes carefully.
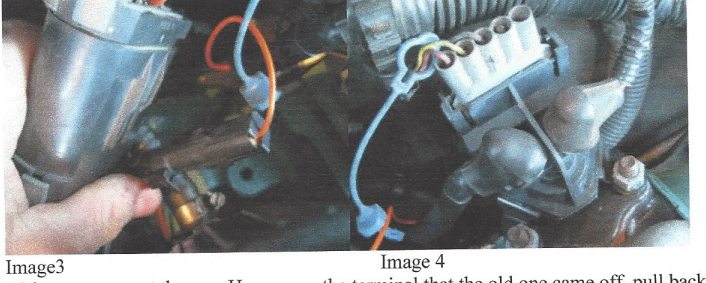
Image 4 shows the controller.
Image 3 shows the large plug and ECM wire.
Installing the New Harness
Preparation:
Ensure the new harness is positioned correctly before connecting it to the glow plugs.
Connect the new ECM wire.
Slip the left-side harness terminal onto the controller.
Use zip ties to secure the harness.
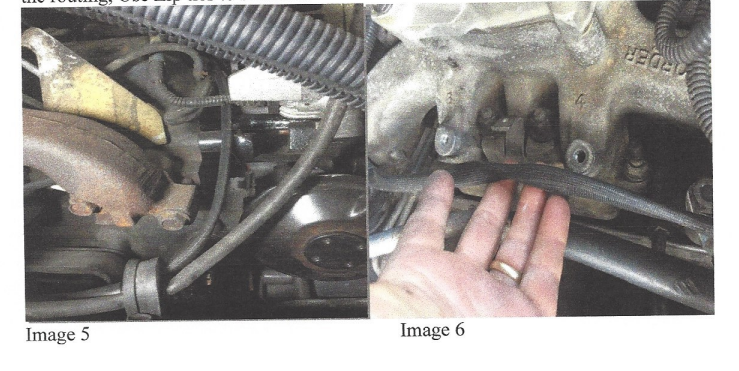
Image 5 and 6 show the routing.
Right-Side Installation:
Cylinder 8 installation is straightforward, down over the back of the valve cover
For cylinders 2, 4, and 6, consider removing the inner fender and downpipe from the turbo for easier access. The new harness can be routed down the side of the intake manifold.
Image 6 shows the routing. We use the late model routing that takes the harness up around the front of the cylinder head and down/back around to the glow plugs.
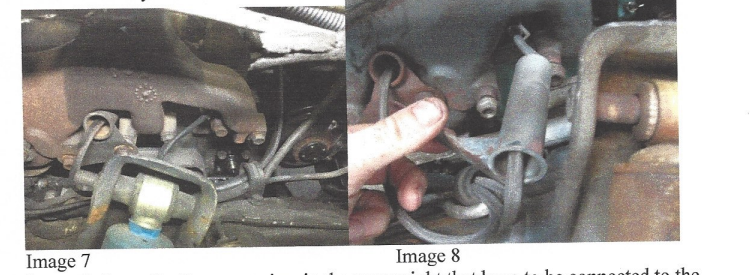
Image 8 shows the wires going to the Glow Plug Cylinder 6 with the tube installed and Cylinder 4 with the tube off but the wire slid thru and plugged in.
Signal Wire Connection:
For early 1997 and older 6.5s, connect the two orange wires in the upper right to the crimp connector (supplied)
Completely remove the old harness to locate the orange wires and ECM lead. You will have to cut them away from the old glow plug harness.
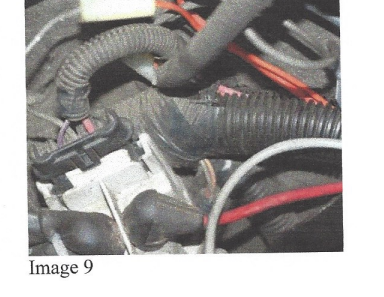
Image 9 shows the 2 orange wires, adjacent to the glow plug relay.
You will use the flying lead supplied with the new harness
On mid 1997 and newer 6.5s, locate the ECM signal wire below the main large plug behind the Fuel Filter housing. Use a screwdriver to detach it (see Image 3).
This is a single pin weather pack plug, you can discard the flying lead that we provide. It's for the older trucks.
No cutting required since the original harness will unplug and remove on these model years
Final Steps:
Route the wires through the existing Adel clamp on the frame (Image 7).
Clean and replace any accessible ground connections.
Ensure the wires do not touch the exhaust manifolds.
Reassemble the components and start the engine.
Thoroughly inspect the installation.
By following these instructions and referring to the image numbers, you should be able to successfully install the 6.5 Turbo Diesel Glow Plug Harness.