
Head gasket/stud procedure
Flattening Stones and/or Machine Work
The all-new Cometic MLS head gaskets work great and only require a little more effort than a standard Mahle head gasket. Whenever you replace head gaskets, you should check to ensure that the deck of the heads and the block is flat. Beyond that, Cometic head gaskets require a very smooth finish that is free of defects and warps. If you are sending your block and heads to a machine shop, they can handle this step for you. Just let them know you are using MLS Cometic head gaskets so they can deck everything slowly and smoothly. If you are tackling this job at home, I recommend using a very large (at least 9x3) flattening stone to smooth out your decks. Use long, full passes back and forth on the deck to eliminate "machining marks." You will only be taking about half a thou off each deck if done correctly. I use a bucket of clean diesel to soak the stone before getting started, which helps keep the stone from clogging and ensures a uniform finish. You just gently work the stone back and forth in smooth, complete passes, and you will see all the high and low spots reveal themselves.
This is the flattening stone we use: https://amzn.to/48o9bnj
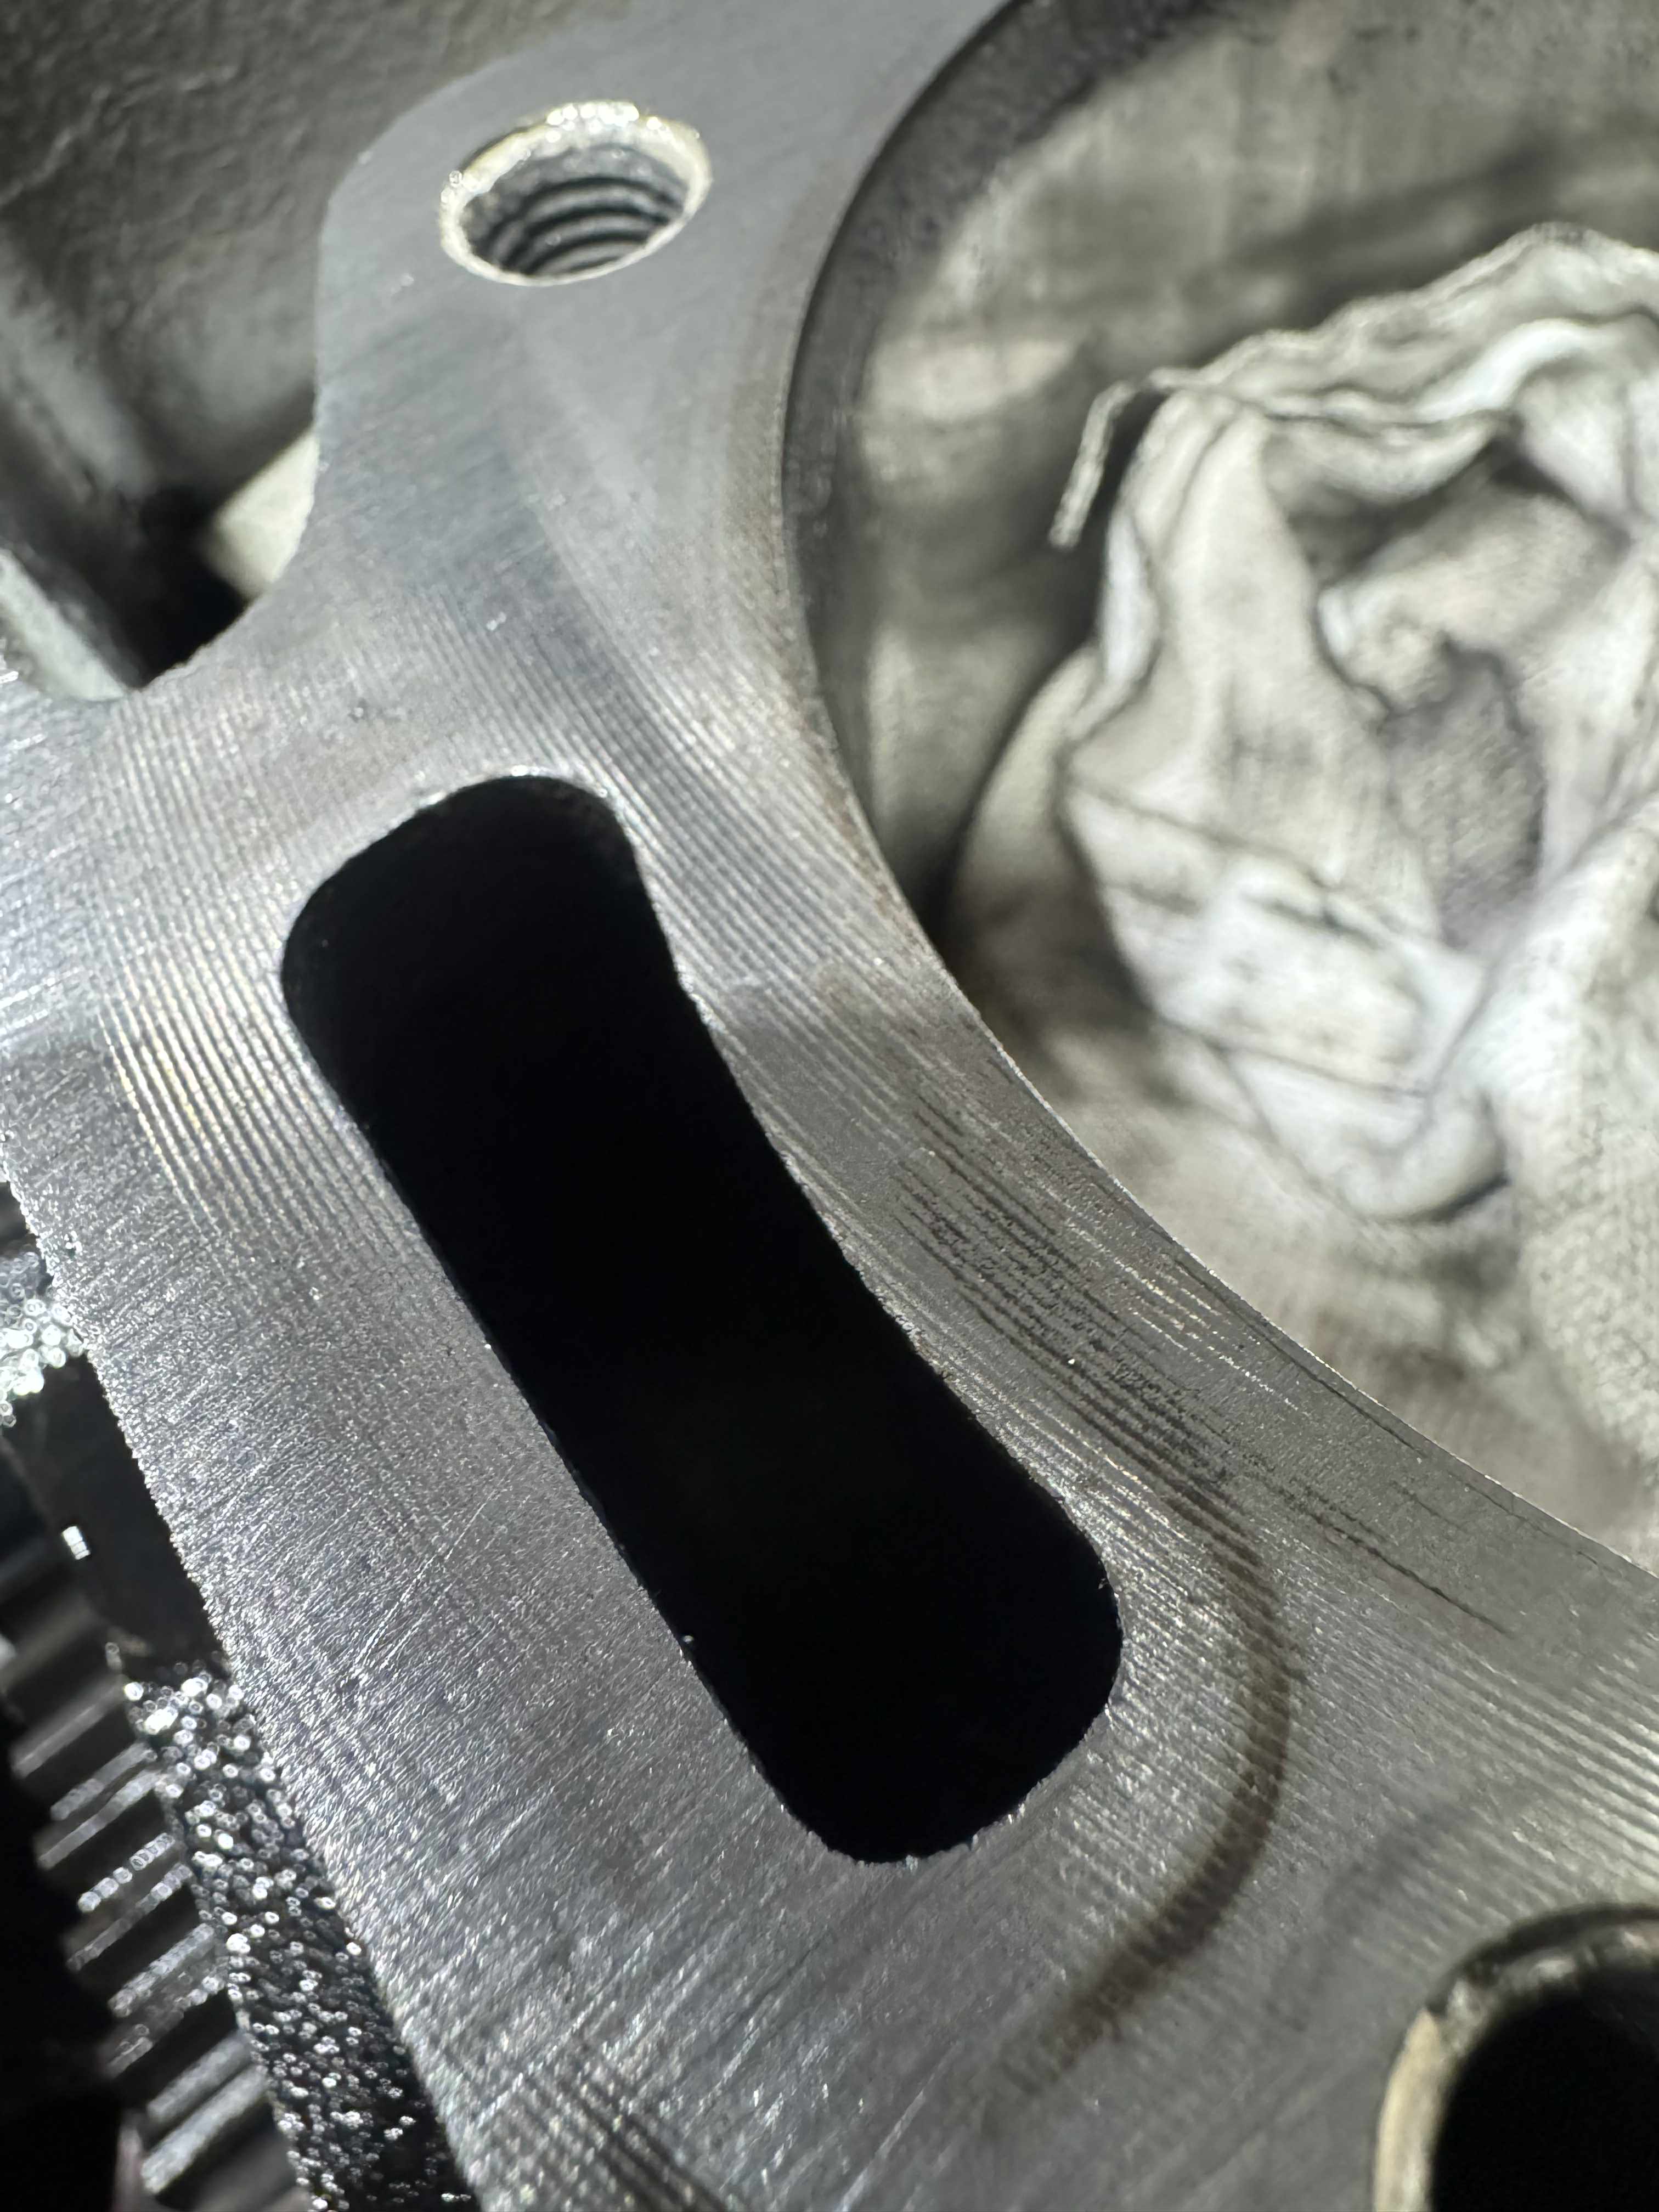
Factory, mass produced, machine work leaves a lot of room for improvement. This surface is not acceptable for MLS head gaskets:
Getting Everything CLEAN
When you are done with the stone, clean all the cylinders and then lubricate them with ATF. ATF is very high in detergent, so it effectively cleans the metal and dirt out of the cylinders. After that, wipe a light coat of engine oil on the cylinders to prevent the pistons from scuffing on startup. After you clean the cylinders and the deck with ATF, then use brake cleaner on the deck with lint-free towels until the towel doesn’t get dirty again.
You can’t have it too clean; if a white rag with brake cleaner turns dark, it’s not clean enough yet. Keep cleaning until the white rag stays white.
Chase all the head stud holes
First, I use some brake cleaner and a quality thread chaser (not a tap) to remove all the large debris from every head stud hole in the engine block.
Next, I use more brake cleaner and a stainless steel .45 caliber pistol brush on a cleaning rod to scrub every single head stud hole in the engine block. Check each head stud hole with a flashlight until they are completely clean.
Clean the studs
Next, I clean the bottom threads of the studs that go into the block with brake cleaner and a clean rag. The oil that ARP uses to keep their hardware from rusting needs to be 100% removed from the bottom threads, or you may not get a good seal and could have an internal coolant leak into your valve cover that would drain to the oil pan, which is a nightmare to fix once the engine is back in the truck. do NOT use gasoline or diesel they have additives that won't easily come off and will not allow for proper seal on the bottom threads.
Prep the heads (if you haven't already)
I stone the head just like I did the block, making long, full passes over the entire deck back and forth until the machining marks are nearly gone and/or the finish is consistent. Then, I perform a thorough cleaning with brake cleaner on a white lint-free towel until the towel stays white. It literally can’t be too clean.
Getting Everything SEALED and TORQUED
Now you are ready to seal and install your new head studs. We recommend ARP 2000 Pro head studs if you never want to worry about doing head gaskets again.
The Sealant
I use Permatex 20539-1P Indian Head Gasket Shellac Compound. It is easier to work with than thread sealant or Permatex The Right Stuff in my opinion.
This procedure will work with high-temperature thread sealant, Permatex The Right Stuff, or Indian Head Gasket Shellac, so pick whichever one you are most comfortable with or have on hand.
I apply sealant to every thread on the bottom of the stud. We have had some customers who only put sealant on the bottom 4-5 threads to try to make less of a mess and have less to clean up. Unfortunately, that hasn't been working well for them, and they found head stud leaks shortly after startup.
Because of this, I recommend fully coating the bottom threads of the studs and dealing with the cleanup; it's still faster and cheaper than pulling the engine again to redo the top end.
Time is critical
If you don't have time to put the heads on and torque everything, do NOT start the job!
We have recently learned that if you put all the studs in the block and don't have time to complete the installation of the heads, and the sealant cures before you get the heads torqued down, you virtually guarantee that coolant will leak past the threads, causing either an internal coolant leak and/or an external coolant leak. Both could ruin your engine quickly!
Thread the studs in until they bottom out and are snug. Yes, I fully seat the studs, even though ARP typically recommends not bottoming out most of their studs. In this case, since all 6.2/6.5 engines have open, non-blind holes in the cylinder deck, they believe that bottoming out the studs and preventing coolant from leaking past the threads is more important.
Give the deck one more cleaning with brake cleaner and remove any excess head gasket shellac that has come out around the studs with a lint-free towel. Do NOT just hose the deck down with brake cleaner; it will degrade the sealant and potentially cause coolant leaks past the threads. Instead, use a little spray on the rag and turn the rag to clean spots when it gets too much sealant built up. Again, it can't be too clean; keep cleaning until the white shop rag stays clean!
I use K&W Copper Coat, which we know is compatible with the Cometic coating. One can will do four head gaskets on both sides. I hang them from a coat hanger and let them hang for a few hours until they aren’t sticky anymore.
Now you can slide the head gasket over your studs and turn your attention back to the heads if you haven't already done so.
Prep the heads if you haven't yet
Prep the heads just like you did the block. I stone the heads just like I did the block, making long, full passes over the entire deck back and forth until the machining marks are gone and/or the finish is consistent.
Then, I perform a thorough cleaning with brake cleaner on a white lint-free towel until the towel stays white. It literally can’t be too clean. Once you are satisfied with your cleanup job, slide the head over the studs.
Time to torque
ARP ULTRA TORQUE LUBE NOTE: You don’t want to use ARP Ultra Torque under the washers; you want the washers to bite in and grip the head. However, you do want to use ARP Ultra Torque on top of the washers, the threads of the studs, and the underside of every nut.
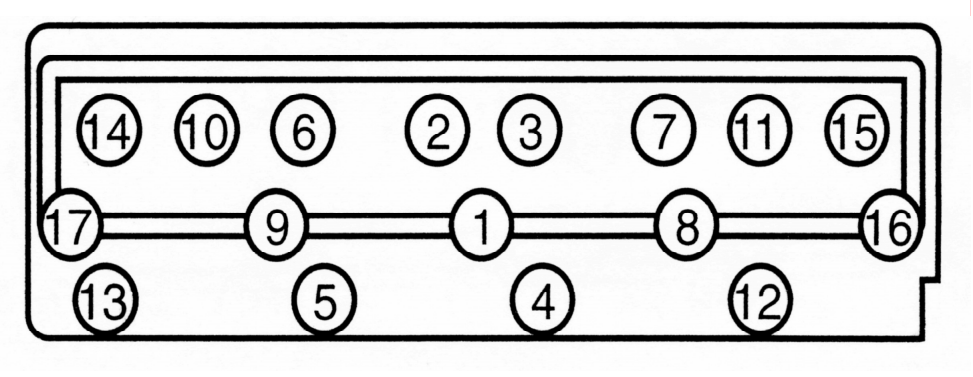
Now you can start your torque sequence based on the diagram provided by ARP (when in doubt, center out or see below). I do 30, 60, 90, and 125 lb-ft. Once you reach 125 lb-ft, you aren't done!
Go do the other head following all previous steps. Once that side is done and torqued to 125 lb-ft, re-torque the first head to 125 lb-ft again. Some nuts will stay put, while some may turn a little; this is normal as the head gasket compresses slightly as intended. I go back and forth from one head to the other as many times as necessary to get all nuts to stop moving.
With Cometic head gaskets, this is usually 2-4 cycles of 125 lb-ft. The Mahle gaskets we sell will take more cycles because the composite gasket is much softer, sometimes requiring up to 6-7 torque cycles. Now you may be standing back, looking at this beast you just assembled, patting yourself on the back for a job well done... Your not done
Torque Sequence
Max clamp last step
We have one step left, and it is the secret to maximum clamp load! In order of your torque sequence per ARP, back off each stud 1/8 turn and re-torque it to the maximum of 125 lb-ft. What this does is hone the nut to the washer and the threads of the stud to the threads of the nut, delivering an additional 10% clamp load! So, you start at the number one center stud, back the nut off 1/8, and re-torque it to 125 lb-ft in one smooth, even pass. The torque wrench will move farther than the 1/8 you backed the nut off; this is normal! Then repeat the same process for the other 16 nuts on this head. Once the first head is done, do the other one.
Now that all studs on both heads have been backed off and re-torqued, go over every stud one more time for peace of mind. If all the studs are solid and nothing moves your good.
NOW you can pat yourself on the back for a job well done! I have been building 6.5's for 15 years, and I wish I could take credit for this complete process, while a lot of it was learned by me the hard way some of it i learned from an old guy at ARP he taught me a lot over the years and I'm happy to help teach it to my customers so I can help make all of our customers successful in their 6.5 adventures!